
For Christmas this year I wanted to put together something unique and unprecedented for JB. This was an idea I’d had in my mind since I visited San Francisco about half a year ago. It’s a popup-book style castle that lights up in a seemingly impossible way.
There is no UV light. It’s lit from an internal source. The design was conceived to be as compact as possible. It uses electroluminescent (EL) sheets discretely embedded inside the structure to create the illusion that the paper is glowing. If you want to see how it was done, read on.
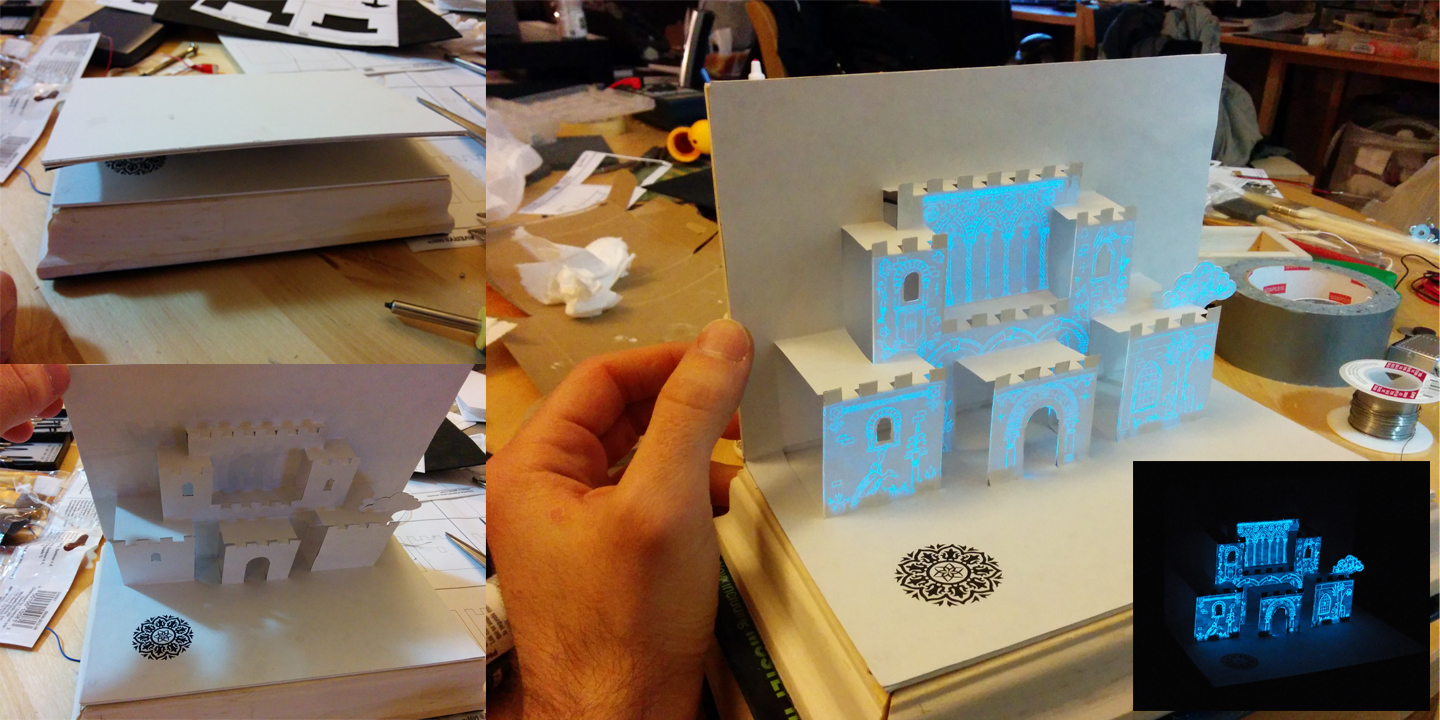
Step 1) I began by doing a few experiments, and fine-tuned the art of paper-cutout-castle-building. The foreground castle shape of the device is cut from a single sheet of paper:

Step 2) Electroluminescent paper requires AC power (DC batteries won’t cut it), so you need an inverter to convert the DC power from a battery pack to AC. The inverter (the black box) is hidden in the base of the structure, and is wired through the floorboards:

Step 3) I wanted to create the illusion of fine threads of light emanating from the walls of the castle. After many fruitless attempts involving acrylics and masking fluid, I settled on the simplest solution which was to print the castle pattern in reverse on the back of the castle sheet. The black toner from the printer blocks the light, and it only shines through the white, unprinted parts:
 Step 4) The EL sheets were then cut into the castle facade shapes, then wired together and threaded through holes in the baseboard.
Quick update: EL (or electroluminescent) sheets are sheets of plastic and (? I don’t know magic?) that glow when an AC current passes through them. Some EL sheets can be cut into any shape you like.

Step 5) The sheets are glued to the back of the castle printout, then sealed over with a very thin adhesive sheet. That’s that white in the picture below. Your basic white labels from any stationary store would work. This serves two purposes. First, it gives the illusion of a single uniform sheet of paper from any angle, and second, it covers the open electrical contacts. The AC current from the inverter, though not dangerous, is high voltage and can shock you if you touch it. Since the back of EL sheets are actually one giant open electrical contact, touching literally anywhere on the back would shock you.


Step 6) Finally, I wired a switch/button at the bottom left corner to open and close the current. There’s also a second switch underneath the base that you can use to turn the light on and off, in case you want it to stay on without having to hold the button down.
Here is the final product lighting up the dark.

